Welcome to Old Time World!

Howard Percival Johnson and His Old Time World by Allison Blake
This is the place where our wonderful, happy past comes alive again. You can see old time cars and boats ready to use and enjoy or ones that need your attention to return to use.
There are how-to articles, stories about old time things and why they are so much fun, copies of old advertisements are available and models of ships from the past. We offer restoration of your old time car or boat, we will teach you how to do the work and help you to learn what you need to know so you can enjoy your treasure. We are willing to research your special find and provide information on old time cars, boats and antiques.
We can provide multiple articles about any place in the world that you plan to visit. Knowing all about your destination adds markedly to your enjoyment and helps you to look forward to the trip. We will answer your questions about restoration or refinishing problems or a new find of any kind, and we look forward to getting to know you.
We offer boat building courses and daytime charters on scenic local rivers. Old Time World is located adjacent to a vast park and nature preserve with hiking, biking, birding, hunting, and fishing outings available; bring your boat or use ours. Three boat ramps are available that link us to the Patuxent River and the great Chesapeake Bay tidal estuary system. Virtually every bird, indigenous to Eastern North America, is in profusion here including the bald eagle.
So we invite you to call or contact us about learning and having fun at Old Time World, 301-627-2114, 15200 Mt. Calvert Rd. Upper Marlboro, Maryland 20772-9619, and we thank you for visiting our web site
Build A Workshop
Hang Those Tools
Every work bench has to have many tools within easy reach; the more the better. Here is a system that can accommodate a vast array of tools, is simple and inexpensive to put in place.
First, build a sturdy bench 42 inches or waist high, glued to the wall or otherwise rock solid. Cover the wall behind this with ¾” or 5/8” plywood, glued, screwed or nailed well. Paint white. Then make a tool board to hold all your pliers and screwdrivers. A ¾” or 1” board works best, 10 or 12” wide. Lay out rows of staggered holes and drill fully with a spade bit. The more holes the better. All sizes of drills should be used as scredrivers come in all sizes. The front row holes should be 5/8” or ¾” in diameter because many pliers have thick handles. Sand and paint well. Mount this 12 inches up above the rear of the workbench, with 4 strong brackets.

You will be surprised how many tools this board will hold. The blank area is for a small box made of cove molding that holds pencils and markers.
At the top of the plywood on the wall, also painted white, should be two shelves mounted so that you can reach up there, standing in front of the bench. In this case the shelves had to be rearranged for better reach convienience. In the picture below, the upper shelf was too high and had to be lowered to underneath the upper one.
Buy a large quantity of 3 inch finishing nails, – for the tool hanging. Start with the most often used, like the hammer. Imagine where you would like it to be when you need it . Hold it against the wall and mark the spots for the nails, move the tool, drive the nails and then hang the tool there. If you like where it is, draw around it with the marker, and move on to the next one. Group logical use tools near where you will use them. The ball pein hammer and hack saw need to be near the vice, and the claw hammer needs to be with the wood working tools like square, measuring tape and pencils. Soon the wall will begin to fill and the tool board holds your screwdrivers and pliers ready to grab. As you see, if you need more holes you can drill them. Ones I have used for years are riddled with holes, every one holding a tool, – ready to use. I have found that you can drill holes at a slight angle, between the pliers and put tweezers and small screwrivers in there. Above the tool shelf, keep hanging all the other hand tools you need, with finishing nails. Each time you come out to the shop, hang a few more tools.. If you don’t like the spot you choose, move it now because once you draw around the hanging tool with a magic marker and hang the next ones close by, they are harder to change. Now, when tools are down, you can see where the they go. Long nails accommodate more than one tool in that spot. I use 3” nails so 2 hammers and 4 sissors can be there, helping to control the pernicious, – lost tool phenomina.
Placement of tools should allow room for easy removal and return space.
Hang larger tools first, about the heaviest should be the pipe wrenches.
If the plywood is thick and well mounted, the nails will drive well and the other tools will not fall off the wall. About 3 solid hits are required, too little, the nail is weak, too much and it is shorter. Once all the tools are hung, you will be surprised how many are there. As time goes on you can fill in the spaces with smaller items that fit in the spaces between the large tools, like a plumbob or a string level. Use shorter finishing nails for these. Many tools need holes drilled in them for convienient hanging. Scrapers and file handles need holes, quarter inch is best.

Drawers under the workbench are a big advantage. Many bench related items like wires, tubing and string lend themselves well to drawer storage.
Locating outlets along the lower front edge of the bench makes plugging in power tools convienient. I keep all of these with their cords coiled on 2 big shelves under the bench so they are easy to reach as well. Make a place for each new tool right away. If you put them in the same spot every time you will know where to look. Keep companion parts in a marked small box or tray near the tool. Use plastic bag ties bought from a garden center in 6 inch lengths to tie up everything. Put a bag tie on each tool near the cord so that the coiled cord can be retained. This preserves the life of the cord and prevents tangling. There are many benefits to be had from a happy workbench space, these tips plus a dose of self dicipline can make maintainance and repair an adventure, rather than a chore.

Soon your bench will look like this. Millions of tools available in an instant and all ready to remove or put back. This is 20 years accumulation. Virtually any kind of repair or service can be done at this bench.
This is what a similar layout with a full length tool board looks like after 20 years use. Every imaginable kind of service or repair can be done here, from model building, to clock and radio repair. The secret of making your bench layout work for you is always putting the tools back as you use them, this way the work space is clear and you can concentrate on the project, then you don’t have to clean up as often. Cleaning up is aided by having a thick layer of newspapers on the benchtop. Once dirty, slide off two layers. Bright lights above the bench are important. Flourscents run parallel to the bench work well, with clip on spots placed where extra light is needed. Keep things neat and you will find yourself looking forward to more time at your bench!
More Wild About Whirlwinds
by Howard Johnson
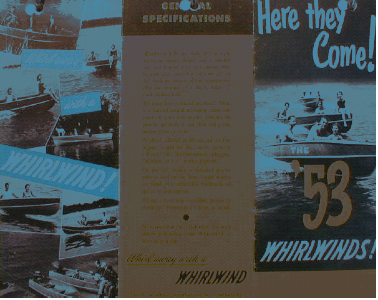
They were years of hard work, 1946 to 1956. Charley Wingo, Ed Hewitt and Charles Abramo transformed the remains of Allied Aviation into Molded Products, Inc. They moved all the equipment 3 times, put 35 friends and family to work, built pontoon bridges, medical boxes, air rescue boats, canoes that weighed 37 pounds, small sailboats in fleets, for the Navy, larger 24’ sailboats for Luders, in Mass. and Navy lifeboats. They went to the NY boat show every year, signed up 40 dealers, nationwide. They set up shop in rented barns near Williamson Veneer in Cockeysville, MD.
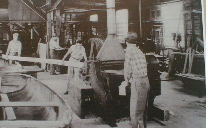
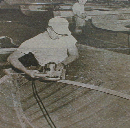
They designed and built several dozen solid wood mandrels on wheels and then molded thousands of boats off of them, baking each until rock solid, in the 30 ft long steel autoclave oven powered by 250 lbs of steam and 150 lbs,vacuum.
They set up and ran a lumber mill, a huge veneer coating department, cutting and shaping departments, assembly rooms and a painting and finishing room.
The three founders worked most weekends improving every aspect of their operation. Designs were constantly critiqued and improved to keep up with the market. Hardware, fastenings, tools, construction methods and advertising steadily evolved over time. Charley Abramo often traveled to Philadelphia, to the Thompson Lumber Co., where he selected the finest, knot free, straight grain mahogany. The record largest board brought by train was 21ft. long 25” wide and 6 inches thick. They were flooded out 3 times and finally bought 3 acres nearby on York Road, the edge of a farm, for $1,000.00 per acre.
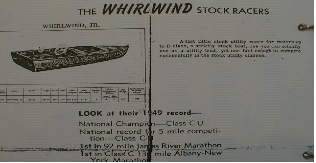
They modified their designs and went racing, everyone participated and all had some measure of success. Charley won first, second, and third prizes in a dozen races during the `46 to `49 era. They even sold cut down, stock racing models. Their successes made all the local papers.
They worked all year around, renting local barns and stacking piles of boats for spring and summer sales. The third Charley, – Charles Martin, drove a Chevy heavy duty pickup with a special trailer they built, that could haul 8 boats at a time. He delivered boats throughout the year to dealers all around the United States. Each one was his baby: he kept touch-up paints and varnish on board and made sure every one was perfect before the papers were signed. Once, several boats flew off the top in a huge storm. He took them back to the factory where they were repaired good as new. Since the factory was flooded out 3 different times, all employees were involved in the cleanup operation. It was a great relief to finally move into the new buildings on York Road.
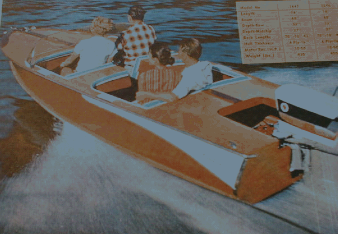
They shipped boats unfinished for do-it-yourselfers, they painted or finished for individual tastes, models were just plain wood or fancy padded and upholstered with blonde decks called avoirdire, – for magazine covers.
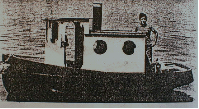
A tiny promotional tugboat for kids was made in limited production.
A custom, double ended Cleopatra’s Barge was made for a special customer.
They had a Montgomery Wards contract for Sea King boats, 300 per year were set aside for spring with the special trim. Every year new models and designs were offered to keep the line fresh. Dealers would sell remaining stock as “new”, each succeeding year, a nationally accepted practice. Employees appeared in all ad photos, color was used for the first time when they could afford this luxury.
In 1956 their New York Boat Show visit revealed that changes were sweeping the industry. The narrow, early models needed to be redesigned. For 1957 wider, more family friendly hull widths were introduced. The whole Molded Products Inc. line was changed. Wrap around windshields, solid floorboards, more bow flair and sweeping painted side trim. All bottom colors were now white, hulls used more layers of veneer, fancy new hardware and steering wheels and bigger engine capacity.
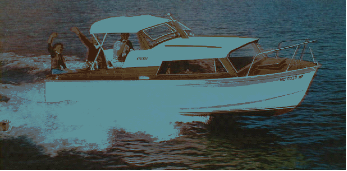
In `58 and `59 soft and hard tops were added and model sizes went to 19’ and 21ft. An exciting new cruiser, completely fitted our for weekend outings, was debuted. These were great times.
In 1960 and 1961 sales began to decline, due to the impact of fiberglass boats and the slowing economy. For the second time they built prototype hulls out of fiberglass. The quality of the materials they could buy was not good. None of their craftsmen liked working with the new materials. The methods required were quite opposite of the one they were using. At the New York Boat Show where they had become friends with boat manufacturers all over the country, they found out that some 600 U.S. boat builders had closed their doors. Their larger boats did not sell well. The writing was on the wall. They had done everything they could, but they had to cut the salaries of all employees for 1961. Many cost reductions were made for `62, vinyl decks, pre-manufactured seats, gold flecked steering wheels and different bow treatments but still sales fell.
In December, the final boats were produced, a closeout auction was held, everything left, went to the dump. The buildings and land quickly sold. Ed Hewitt paid every supplier and all the company’s bills. The money from the land and buildings gave the founders a steady income. Fifteen years and fifteen thousand boats were behind them, now. Whirwind boats were the lightest, fastest and most beautiful mahogany boats, – ever made!


